

Quick Overview:
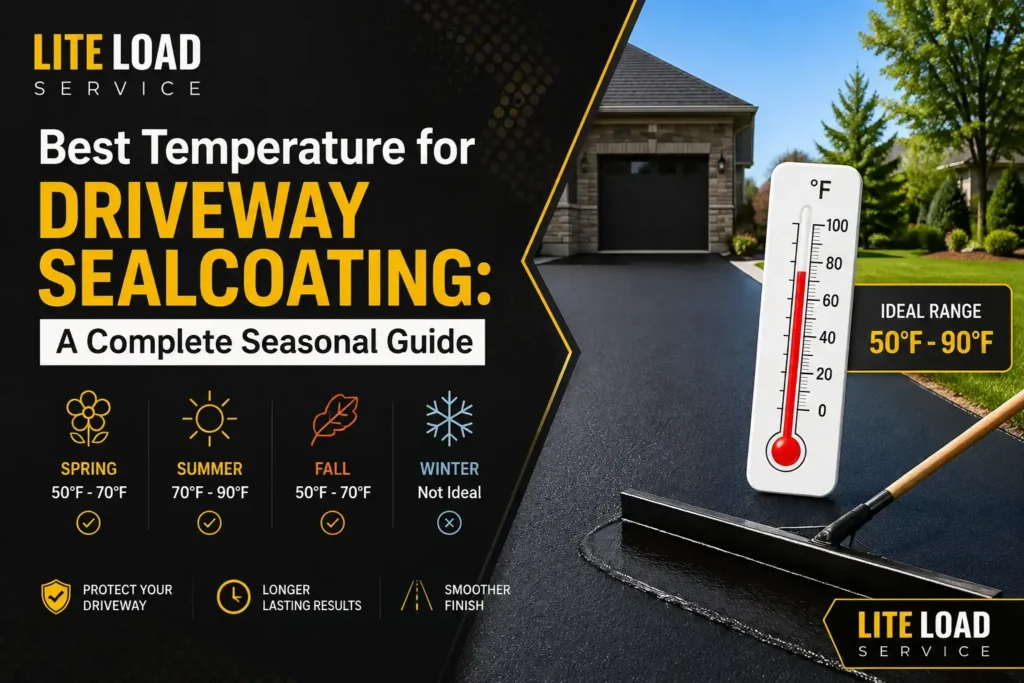
This comprehensive guide explains why temperature is the most critical factor in successful driveway sealcoating. The optimal temperature range for applying sealcoat is 50°F-85°F, with ideal results between 65°F-75°F. Applying sealer outside this window leads to adhesion failures (too cold) or premature drying with lap marks (too hot). The guide covers seasonal timing (best: summer; acceptable: spring and fall; avoid: winter), weather conditions (humidity, wind, rain forecasts), and common mistakes that cost homeowners thousands in repairs. Proper temperature sealcoating saves $1,000-3,500 long-term by extending pavement life 5-7 years compared to failed applications.
Key Takeaways:
- Ideal sealcoating temperature: 50°F-85°F (optimal: 65°F-75°F)
- Cold weather (<50°F): Sealer won’t adhere; peels within weeks
- Hot weather (>85°F): Dries too fast; creates lap marks and thin spots
- Best season: Summer (consistent temps, minimal rain)
- Second best: Fall (lower prices, good availability)
- Avoid: Winter (too cold for proper curing)
- Weather matters: Humidity 50-85%, no rain for 24 hours after, calm winds (<5 mph)
- Financial impact: Proper sealcoating saves $1,000-3,500 vs. failed applications
- Maintenance frequency: Reseal every 2-3 years for maximum protection
Who Should Read This:
- Homeowners planning to sealcoat their driveway this year
- Property managers with commercial parking lots
- Anyone who’s had poor sealcoating results and wants to understand why
- People comparing contractors and want to know industry standards.
Why Temperature Matters for Your Sealcoating Investment
Sealcoating your driveway is one of the best investments you can make to protect your asphalt from harsh weather, UV rays, and vehicle fluids. But here’s what many homeowners don’t realize: the temperature for sealcoating your driveway is critical to the success of your project.
Apply sealer at the wrong temperature, and you risk a failed coating that won’t adhere properly, leaving your driveway vulnerable to damage. Apply it at the right temperature, and you’ll get a protective layer that lasts 2-3 years. In this comprehensive guide, we’ll walk you through everything you need to know about sealcoating temperatures, timing, weather conditions, and common mistakes that cost homeowners thousands of dollars in premature repairs.
What Is the Ideal Temperature for Driveway Sealcoating?
The best temperature for driveway sealing is between 50°F and 85°F, with optimal results between 65°F and 75°F. Temperatures below 50°F prevent the sealer from bonding properly to the asphalt surface. Above 85°F, the sealer dries too quickly, creating an uneven finish and weak protection.
This temperature window is based on industry standards set by the National Asphalt Pavement Association (NAPA) and reflects the optimal conditions under which polymer-based sealcoating products activate and cure. Understanding these temperature requirements is essential because sealcoating is an investment that only works if the conditions are right during application.
Optimal Temperature Ranges for Sealcoating
| Temperature Range | Suitability | Drying Time | Notes |
| Below 50°F | Not Recommended | 5+ days | Sealer won’t adhere; will peel within weeks |
| 50°F – 65°F | Acceptable | 24-48 hours | Can work, but may have weak adhesion; avoid if possible |
| 65°F – 75°F | OPTIMAL | 12-24 hours | Perfect bonding, even finish, maximum durability |
| 75°F – 85°F | Good | 6-12 hours | Reliable results; fast drying is beneficial |
| Above 85°F | Not Ideal | 2-5 hours | Sealer dries too fast; may create lap marks and uneven coverage |
Why Does Temperature Matter So Much for Sealcoating?
Temperature affects how driveway sealer bonds to asphalt at the molecular level. The chemistry of sealcoating products is specifically designed to work within certain temperature parameters. When conditions fall outside that window, the coating fails either because it doesn’t cure properly or because it dries too quickly.
Bonding Chemistry
Sealcoating products contain polymers that need warmth to cure properly. Below 50°F, these polymers don’t activate, leaving the sealer sitting on top of your driveway like paint on glass; it won’t stick. The sealer will peel, flake, and wear away in just a few weeks, leaving your asphalt exposed to UV rays, water intrusion, and freeze-thaw damage.
When polymers don’t bond, you lose all the benefits of sealcoating. Your driveway doesn’t get the UV protection, the oxidation barrier, or the water resistance that makes sealcoating worth doing in the first place. Instead, you’ve wasted money and still need to reseal your driveway.
Evaporation and Drying
Above 85°F, sealers dry so quickly that the product doesn’t have time to self-level and fill in microscopic asphalt pores. This creates lap marks (overlapping application lines that are visible) and thin spots where the protective layer is weaker. The sealer hardens before it can properly bond to the pavement surface.
Best Time of Year to Seal Driveway: Seasonal Guide
The best time of year to seal a driveway depends on your climate. Since temperature is the key factor, you need to pick seasons when weather conditions stay within that ideal 50°F-85°F range for at least a full day. In Michigan and the Great Lakes region, this window is much shorter than in southern states.
Spring Sealcoating (Late April–May)
Spring is an ideal time because asphalt has just endured a harsh Michigan winter. ✓ Pros: Temperatures warming up (60-75°F); less rain than fall; property owners motivated after winter damage. ✗ Cons: Mornings and nights may still be too cold; weather unpredictable; asphalt surface may still be wet from snowmelt.
Summer Sealcoating (June–August)
Summer is the peak sealcoating season because weather is most predictable. ✓ Pros: Consistent warm temperatures (65°F-85°F); fast drying; minimal rain; time to fully cure before fall. ✗ Cons: Mid-afternoon heat can be problematic; peak demand drives prices up 20-40%; contractors booked weeks in advance.
Fall Sealcoating (September–Early October)
Fall is underrated for sealcoating. ✓ Pros: Moderate temperatures (60°F-75°F); less contractor demand means lower prices (10-20% discount); better availability; competitive pricing. ✗ Cons: Days get shorter; temperatures drop quickly; unpredictable weather; tight window before winter.
Winter Sealcoating (November–March)
Winter is NOT the time to sealcoat in Michigan. Temperatures consistently below 50°F and freeze-thaw cycles make proper curing impossible. ✗ Avoid: Too cold for proper adhesion; freeze-thaw cycles damage newly applied sealer; most contractors don’t offer sealcoating.
Temperature + Humidity + Weather Conditions: The Complete Picture
Temperature is critical, but it’s not the whole story. Professional contractors monitor multiple weather factors before scheduling sealcoating.
Humidity Levels: Aim for 50-85% humidity. High humidity (above 85%) slows drying and can leave a dull, streaky finish. Low humidity (below 30%) causes sealers to dry too fast, creating lap marks and uneven finish problems.
Wind Conditions: Excessive wind increases evaporation and can blow dust onto wet sealer. Ideal conditions: calm or light winds (under 5 mph). Professional contractors check wind forecasts and time application for calm periods.
Rain Forecasts: No rain should be expected for at least 24 hours after application. Rain on wet sealer will wash it off or create a streaky finish. This is why contractors are strict about weather forecasts.
Direct Sunlight & Shade: While some sun helps curing, intense midday sun (over 95°F) can be problematic. Overcast days with warm temperatures (65-75°F) are actually ideal because the sealer dries evenly without thermal stress.
What Happens When Sealcoating Is Applied at Wrong Temperatures?
Applying seal-coated driveway sealer outside of optimal temperatures leads to costly problems that damage your investment.
Cold Weather Application (Below 50°F):
- Sealer doesn’t adhere to the asphalt surface (sits on top like water on wax)
- Peeling and flaking within 2-4 weeks
- Failed bonding leaves your driveway completely unprotected
- You may need to re-seal immediately (wasting money and time)
- Poor adhesion allows water to penetrate, causing potholes
- Freeze-thaw damage accelerates as water gets underneath sealer
Hot Weather Application (Above 85°F):
- Visible lap marks where coats overlap (professional appearance ruined)
- Uneven color and finish quality (dark and light patches)
- Thin spots with weaker protection (sealer not thick enough)
- Premature wearing in high-traffic areas (cracks within 6 months)
- Reduced lifespan (sealer may only last 1-2 years instead of 2-3)
- Appearance suggests poor-quality work (even if contractor was skilled)
Why Proper Temperature Sealcoating Saves You Money Long-Term
Sealcoating at the right temperature isn’t just about appearance; it’s an investment that protects your driveway for years.
Poor sealcoating (wrong temperature): Costs $200-400 initially → Fails/peels within 2-4 weeks → Requires $200-400 redo job → Driveway damaged by water intrusion → Major repair needed in 1-2 years ($2,000-5,000) = Total cost: $2,400+ for damaged driveway
Professional sealcoating (right temperature): Costs $300-500 initially → Lasts 2-3 years → Reseal every 3 years ($300-500) → Driveway stays protected, no major damage → Useful life extended 5-7 years = Total cost: $900-1,500 over 6 years
The difference? Proper temperature sealcoating saves $1,000-3,500 on emergency repairs and extends your driveway life by 5-7 years.
How to Prepare for Professional Sealcoating
- Check the Forecast: Ensure temperatures will stay in the 50°F-85°F range for at least 48 hours. Use a weather app that shows hourly forecasts.
- Clean Your Driveway: Remove dirt, debris, and weeds so sealer makes full contact with asphalt. Power wash or sweep thoroughly.
- Fill Cracks and Potholes: Sealcoating alone won’t fix structural damage. Major repairs should be done first before any sealing work begins.
- Clear Parked Vehicles: You’ll need to keep cars off the driveway for 24-48 hours after application. Plan for street parking or alternative arrangements.
- Plan Ahead: Reputable contractors schedule sealcoating during optimal weather windows and may be booked during peak season. Book your appointment 2-4 weeks in advance.
Protect Your Driveway With Professional Sealcoating
The temperature for sealcoating your driveway is one of the most important factors in the longevity of your asphalt investment. Applying sealer at the wrong temperature leads to peeling, weak protection, and wasted money. It also puts you on a path to expensive driveway repairs within 1-2 years.
At Lite Load Services LLC, we monitor weather conditions carefully to ensure your driveway sealcoating services are applied at the optimal temperature every time. Our team in West Michigan knows the local climate and schedules sealcoating during the ideal seasonal windows for maximum durability. We don’t cut corners; proper conditions mean proper results.
Get a Free Sealcoating Estimate
Ready to protect your driveway? Contact Lite Load Services LLC today for a free estimate. We’ll assess your asphalt condition, recommend the best time to seal based on current weather patterns, and deliver professional results you can count on. Call us at (269) 751-6037 or request an estimate online.